by Jan Ove R. Ebbestad
During the hectic field days loads of fossils and sediment samples are collected. These make their way to the Tromsø Museum collection and are an absolutely essential part of the scientific documentation of the studies that we do, together with photographs, measurements and field notes. The Museum collection also becomes a permanent scientific archive that is available for researchers all over the world, so they don’t have to go to the field and try to find similar specimens. It is first of all very expensive and the Digermulen Peninsula is pretty remote. In addition fossils and samples do not just pop up but requires careful and diligent collecting. So therefore we try to bring back as many of the specimens we consider valuable for our studies.
But we can’t catch them all!
Sometimes a fossil cannot be extracted from the rock it is in simply because it is to tricky and any attempts to collect them may end up destroying them instead. Or the fossils may be too large to haul back. We do not have access to any help and have to rely on our own blood, sweat and tears to get the samples out. So what can we do to document them? Photographs or drawings help, but the next best to the real thing is a cast.
This year we therefore brought with us silicon rubber to cast specimens. We had previously selected a few prize specimens to cast and knew therefore approximately how much equipment and casting supplies we needed.
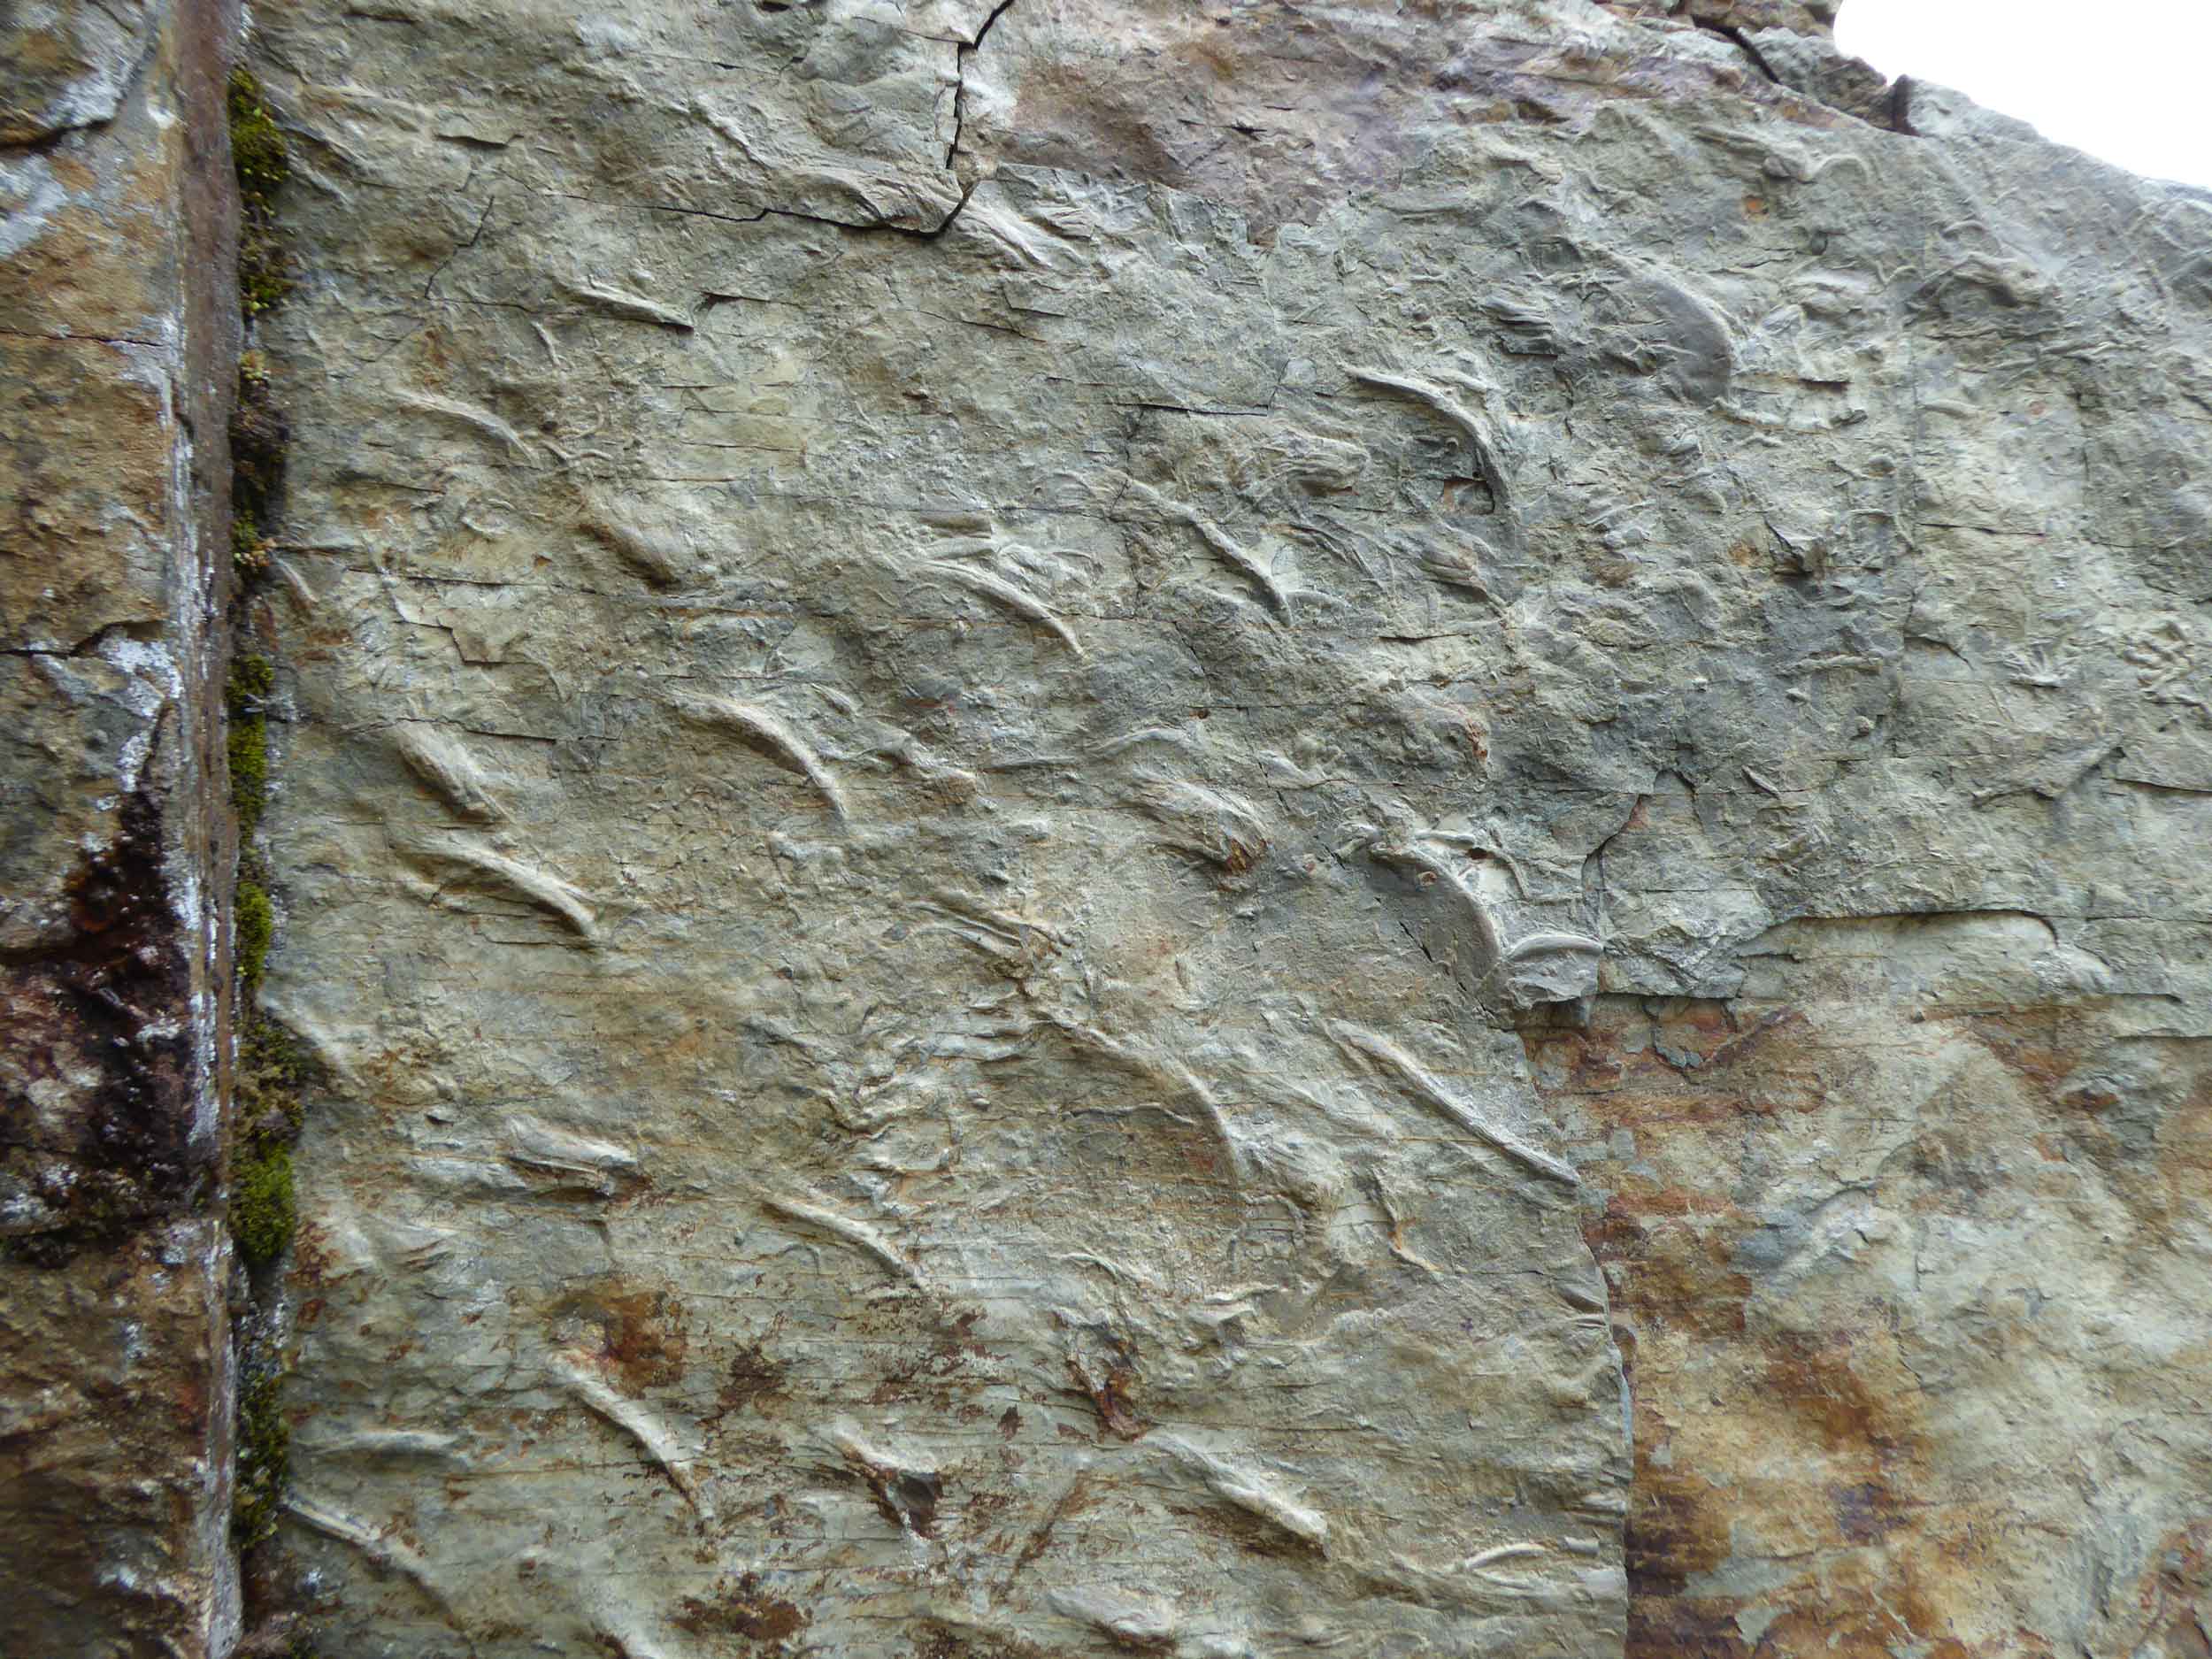
Figure 1. A large and very instructive trace fossils called Dimorphichnus that we decided to cast (photo Magne Høyberget).
We had a box with the stuff, including the silicon, the catalyst to make it cure, thickener to make it sticky, black powdered colour, a couple of containers to mix it in, a scale to get the proportions of silicon and catalyst right, protective gloves and aprons, paper tissue to clean, brushes to apply the ready mix, cloth to strengthen the silicon and plaster strips to make a casing (mother mould). The colour is added to the silicon to create a dark surface for contrast when we later will photograph the silicon casts.
The casting process is pretty straight forward, but requires warm and dry conditions to work. After mixing the silicon mass we applied it to the fossils with a brush, making sure to work it in thoroughly so that the silicon catches all the details and we get all the air bubbles out.
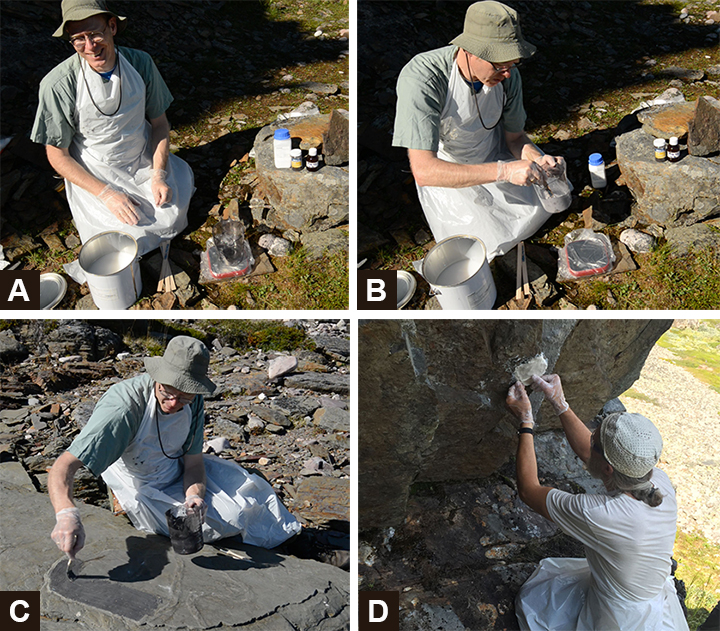
Figure 2. The casting process. A) selection of the equipment needed for casting, B) mixing the silicon. C) applying the silicon with a brush. D) applying the plaster to support the silicon (mother mould) (photos Wendy Taylor).
We applied three layers with cloth in between for added strength. We then left the silicon over night to let it cure, and the following they we prepared the mother mould with the plaster strips. These were simply dipped in water and applied to the silicon in several layers and left over night to dry and harden.
The end result is a cast of the fossil, but the ‘negative’ if you like. Back in the lab we can reproduce the fossil as it looked in the field by preparing a plaster cast from the silicon mould.
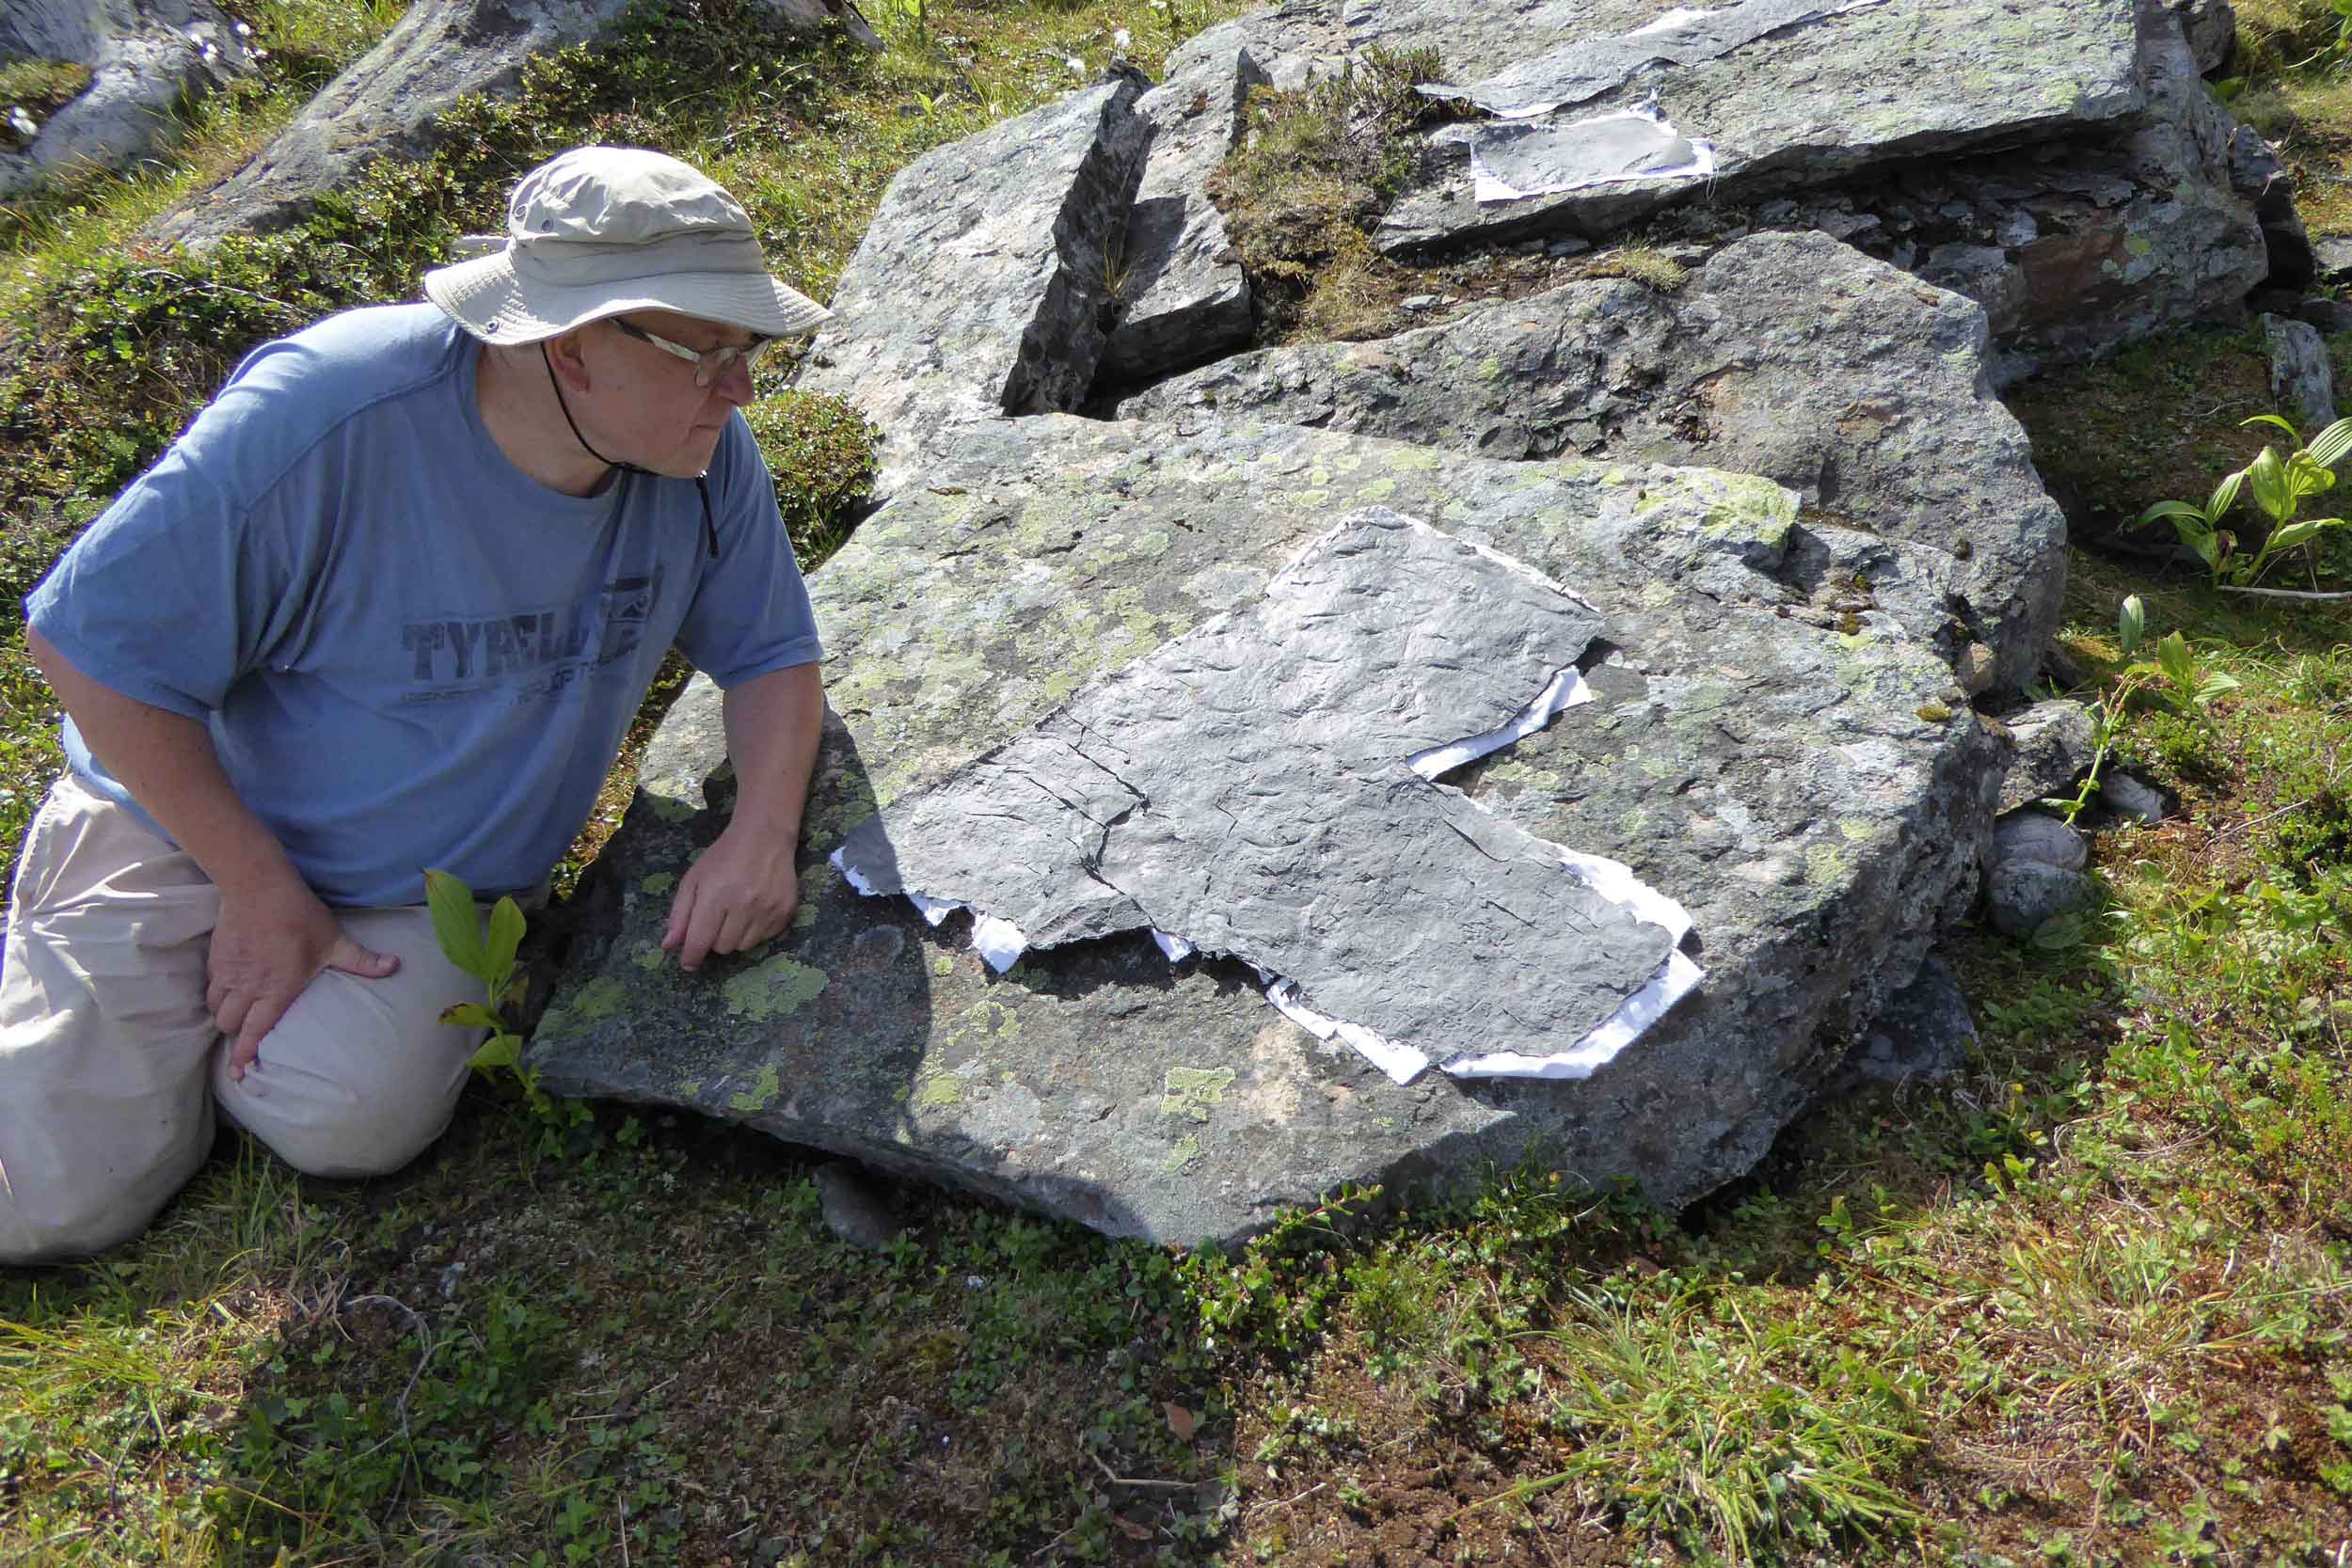
Figure 3. Sören with the finished silicon mould and plaster casing (photo Magne Høyberget).